How to Install Car Parts Without Scratches: Essential Tools and Handling Techniques
- Sep 8, 2025
- 7 min read
Nothing ruins the satisfaction of a successful DIY car repair quite like discovering scratches on your newly installed part. Whether you're replacing a bumper, installing a fender, or swapping out trim pieces, learning how to install car parts without scratches is crucial for achieving professional-looking results at home.
The frustration of damaging expensive parts during installation is all too common among DIY enthusiasts. One small slip with the wrong tool, an accidental scrape against another surface, or improper handling can turn a money-saving repair into a costly mistake. The good news? With the right techniques, tools, and preparation, you can avoid these pitfalls entirely.
Understanding Why Scratches Happen During Installation
Before diving into prevention techniques, it's important to understand the common causes of installation damage. Most scratches occur during three critical phases: preparation, handling, and the actual installation process.
During preparation, rushed cleaning or using abrasive materials on delicate surfaces can cause micro-scratches that become visible under certain lighting conditions. The handling phase presents risks when parts are moved without proper protection or support, leading to contact with sharp edges or rough surfaces.
The installation itself poses the greatest risk, as tools slip, parts shift unexpectedly, or installers apply excessive force to stubborn components. Metal tools against painted surfaces are particularly problematic, as even light contact can leave permanent marks on your car's finish.
Essential Tools for Scratch-Free Installation
Having the right tools is half the battle when it comes to preventing installation damage. The difference between professional results and costly mistakes often comes down to using equipment specifically designed for automotive work.
Protective Equipment
The foundation of any scratch-free installation begins with proper protective equipment. Soft cotton gloves or nitrile gloves prevent fingerprints and provide better grip while handling delicate surfaces.
Moving blankets or heavy towels are indispensable for protecting both your new part and your vehicle during the installation process. These create barriers between surfaces and provide cushioning when placing parts on the ground or against your car.
Plastic sheeting or painter's tape helps protect surrounding areas from accidental contact with tools or parts. This is especially important when working in tight spaces where movement is restricted.
Non-Marring Tools
Traditional metal tools are often the culprit behind installation scratches. Investing in plastic prying tools, trim removal sets, and composite scrapers can dramatically reduce the risk of surface damage. These tools are specifically designed for automotive applications and won't scratch painted surfaces.
Torque wrenches with protective sleeves prevent over-tightening and reduce the chance of tool slippage that leads to scratches. Socket sets with magnetic holders keep tools secure and prevent them from falling onto painted surfaces.
Panel beating hammers with soft faces or plastic-tipped mallets are essential for gentle persuasion when parts need slight adjustments during fitting.
Organization and Support Equipment
A clean, organized workspace prevents tools from rolling around and potentially contacting your vehicle or parts. Tool trays, magnetic strips, and organized toolboxes keep everything in its place.
Adjustable sawhorses or workbenches provide stable support for larger parts, preventing them from flexing or moving during installation. This stability is crucial when precise alignment is required.
Preparation: Setting the Stage for Success
Proper preparation is where successful installations begin, and it's often the most overlooked aspect of DIY car repair. Taking time to set up your workspace correctly can prevent 90% of common installation problems.
Workspace Setup
Creating the right environment is just as important as having the right tools. Choose a well-lit area, preferably indoors or in a covered garage, to minimize dust and debris that can cause scratches when trapped between surfaces.
Clear the workspace of any unnecessary items and ensure adequate room to maneuver around your vehicle. This prevents accidental contact with obstacles during the installation process.
Position your lighting to eliminate shadows in the work area, as poor visibility often leads to tool misplacement and accidental contact with painted surfaces.
Part Inspection and Cleaning
Before beginning any installation, thoroughly inspect both your new part and the vehicle's mounting area. Look for any debris, rust, or damage that could interfere with proper fitment and potentially cause scratches during installation.
Clean all surfaces with appropriate automotive cleaners, avoiding harsh chemicals that might damage paint or protective coatings. Use microfiber cloths rather than paper towels, which can be abrasive. Pay special attention to mounting points and alignment guides, ensuring they're free from old gasket material, corrosion, or damaged clips that could prevent proper seating.
Handling Techniques That Prevent Damage
Even with the best tools and preparation, improper handling can quickly turn a smooth installation into a disaster. These proven techniques will help you maintain control and protect your investment throughout the process.
Proper Lifting and Support Methods
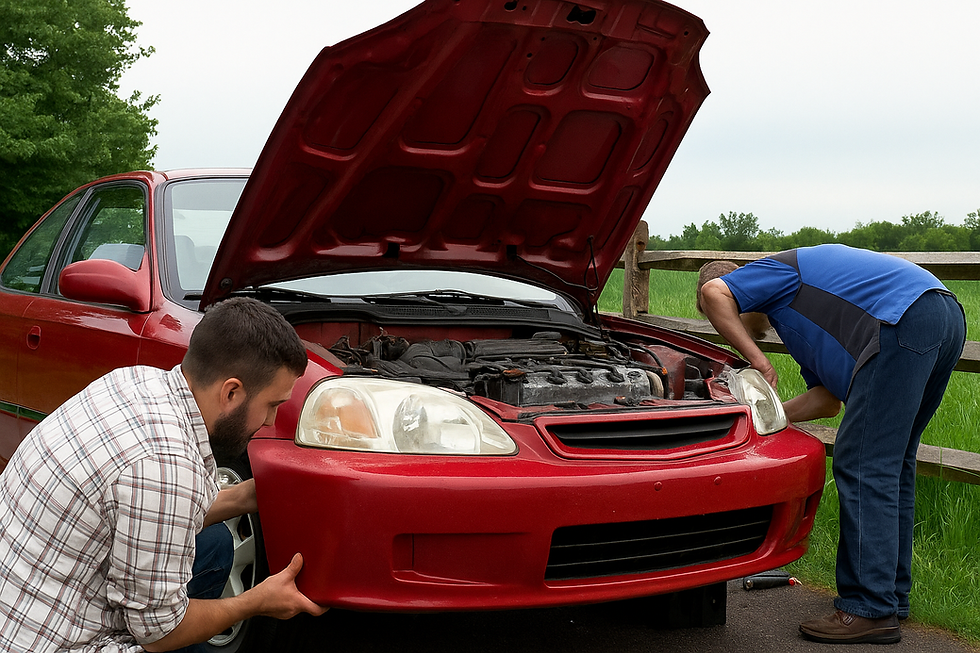
Large parts like bumpers or fenders require careful handling to prevent flexing and stress that can lead to paint cracking or surface damage. Always support parts at multiple points, distributing weight evenly to maintain structural integrity.
Use the "buddy system" for heavy or awkward parts. Having an assistant ensures better control and reduces the risk of dropping or striking other surfaces. Communication is key – establish clear signals for coordinating movements.
When working alone, use temporary supports like foam blocks or adjustable stands to hold parts in position while making adjustments. This prevents fatigue-induced mistakes that often result in scratches.
Strategic Approach to Installation
Plan your installation sequence carefully, identifying potential contact points and clearance issues before beginning. This mental rehearsal helps you anticipate problems and prepare solutions in advance.
Remove or protect adjacent parts that might interfere with the installation. For example, when installing a new fender, make sure to protect the door and A-pillar from being 'bumped'.
How to Install Car Parts Without Scratches: Step-by-Step Process

Pre-Installation Phase
Begin by laying out all necessary tools and materials within easy reach but away from your work area. This organization prevents fumbling for tools that might accidentally contact painted surfaces. Apply protective tape or covers to vulnerable areas near your work zone. Pay particular attention to edges, curves, and raised surfaces that are prone to accidental contact. Test fit new parts whenever possible before final installation.
During Installation
Move deliberately and maintain awareness of your tool positioning at all times. Keep tools away from painted surfaces when not in active use, and never place them on your vehicle for convenience.
Use proper technique when tightening fasteners. Start all bolts by hand to prevent cross-threading, and use steady, controlled pressure when applying torque. Rushed tightening often leads to tool slippage and surface damage. Check your progress frequently, stepping back to assess alignment and fit before proceeding to the next step.
Final Positioning and Adjustment
Make fine adjustments gradually, using gentle pressure and appropriate tools. Avoid the temptation to force parts into position, as this often indicates an underlying alignment issue that needs addressing. Double-check all fastener tensions according to manufacturer specifications. Proper torque prevents loosening that could lead to part movement and subsequent scratches from vibration.
Advanced Techniques for Complex Installations
Some installations require specialized approaches beyond basic scratch prevention methods. These advanced techniques separate amateur repairs from professional-quality results.
Working with Delicate Surfaces
Some modern vehicles feature special paint finishes, carbon fiber panels, or delicate trim pieces that require extra care. These materials often have specific handling requirements and may need specialized tools or techniques.
Research your specific vehicle and part materials before beginning work. Manufacturer guidelines often include valuable information about proper handling and installation procedures.
Consider using temporary protective films on high-risk areas during installation. These removable coverings provide an extra layer of protection against accidental damage.
Professional Tricks and Tips
Many professional installers use foam padding or bubble wrap to create custom protective covers for specific parts or vehicle areas. This improvised protection can be invaluable for complex installations.
The "two-person rule" applies to any part longer than four feet or weighing more than 25 pounds. Having assistance isn't just about convenience – it's about maintaining control throughout the installation process.
Professional shops often invest in specialized lifting equipment and supports designed specifically for automotive parts. While these tools represent a significant investment, they can be worthwhile for enthusiasts who frequently work on vehicles.
Common Mistakes and How to Avoid Them
Learning from others' mistakes is far less expensive than making them yourself. These frequently encountered pitfalls can derail even the most carefully planned installation.
Tool-Related Errors
Using inappropriate tools is perhaps the most common cause of installation scratches. Standard household tools, while familiar, often lack the precision and surface-friendly design needed for automotive work.
Rushing through tool selection leads to poor choices and increased risk. Take time to select the right tool for each specific task, even if it means temporarily stopping work to find or purchase the appropriate equipment.
Environmental Factors
Wind, dust, and temperature fluctuations can all contribute to installation problems. Outdoor work exposes parts to debris that can become trapped between surfaces, causing scratches during installation.
Poor lighting creates shadows and blind spots where damage can occur unnoticed until it's too late to prevent. Invest in adequate lighting equipment for your workspace.
Procedural Mistakes
Skipping the planning phase is a costly mistake that often leads to improvised solutions and increased risk of damage. Proper preparation always pays dividends in the final result.
Ignoring manufacturer installation guidelines may seem like a time-saver, but these instructions often include crucial information about proper handling and installation sequence.
Frequently Asked Questions
What should I do if I accidentally scratch a part during installation?
If you notice a scratch during installation, stop immediately and assess the damage. Minor scratches in clear coats can often be polished out using automotive polishing compounds and proper technique. For deeper scratches that penetrate the paint layer, you may need professional touch-up work or part replacement. The key is addressing the issue promptly rather than hoping it won't be noticeable once installation is complete.
Can I use household tools for car part installation, or do I need specialized automotive tools?
While some household tools can work for basic installations, specialized automotive tools are strongly recommended for installing car parts without scratches. Standard household tools often lack the precision, protective coatings, or appropriate designs needed for delicate automotive work. Automotive-specific tools like plastic trim removal sets, non-marring prying tools, and torque wrenches with protective sleeves are designed specifically to prevent surface damage during installation.
Conclusion
Learning to install car parts without scratches requires patience, preparation, and the right approach. By investing in proper tools, taking time to plan your installation, and following careful handling techniques, you can achieve professional-quality results from the comfort of your own garage.
The satisfaction of completing a scratch-free installation extends beyond just the immediate repair – it builds confidence for future projects and ensures your vehicle maintains its appearance and value. Remember, the small investment in proper tools and protective equipment pays dividends in preventing costly damage and rework.
For those seeking the highest quality results with minimal installation risk, pre-painted parts offer an excellent solution. When parts arrive already painted to your exact color specifications, you eliminate the additional complexity of paint matching and finishing work, allowing you to focus purely on proper installation technique.
Ready to tackle your next repair project with confidence? At Painted OEM Parts, we specialize in precision-painted replacement parts that arrive ready for installation. Contact us today to find the perfect pre-painted part for your vehicle and start your scratch-free installation journey with confidence.
Comments