


Car Paint Repair Regrets: 7 Common DIY Mistakes That Ruin Your Finish

You've watched the tutorials, bought the spray paint, and cleared out the garage. This weekend, you're fixing that scratched bumper yourself and saving hundreds of dollars.
Fast forward 48 hours: the paint is peeling, the color doesn't match, and runs down the side make your car look worse than before. Sound familiar?
DIY car paint repair can be rewarding when done right, but the difference between a professional finish and disaster often comes down to avoiding a few critical mistakes. Professional body shops have more than fancy equipment. They have knowledge, experience, and understanding of what can go wrong at every step.
Understanding these common pitfalls will help you decide when to tackle repairs yourself and when pre-painted replacement parts might be the smarter solution. Let's explore the seven mistakes that separate successful DIY paint jobs from expensive do-overs.
1. Skipping the Foundation: Poor Surface Preparation
The most common mistake isn't about the paint at all. It's what happens before the first drop of color touches your car.
Without proper preparation, you're setting yourself up for peeling, bubbling, and premature failure regardless of paint quality. Surface prep typically takes 70% of total project time.
Proper surface preparation requires:
Thorough washing with wax-free automotive soap
Clay bar treatment to remove bonded contaminants
Sanding with appropriate grit (400-600 for primer, 800-1200 for paint)
Tack cloth cleaning to remove all dust
Applying proper primer for your repair type
If you're rushing through prep to get to painting, you're heading for trouble. This is where professionally pre-painted parts shine. When you receive a part already prepared and painted in controlled conditions, you skip the stage where most DIY projects fail.
2. The Color Matching Gamble: Why "Close Enough" Never Is
You found your paint code and ordered matching spray paint. Perfect, right?
Not quite. Automotive paint fades over time. Your door jamb code indicates the factory color, but UV exposure, weather, and age have shifted that shade. Your "perfect match" paint is matching a car that no longer exists.
Color matching complexities:
UV fading affects horizontal surfaces more than vertical ones
Different panels fade at different rates
Same color codes vary between manufacturing batches
Metallic and pearl finishes require professional equipment to match properly
Professional body shops use spectrophotometers to analyze your car's current color and adjust formulas. They blend between panels for seamless transitions.
When you spray from a can in your driveway, you face two challenges: the color formula may not match your faded paint, and achieving a factory-quality finish with spray paint is extremely difficult. The application method itself often creates texture and coverage issues that make mismatches more obvious.
Pre-painted parts offer advantages in application quality and professional finish, though color matching still depends on your vehicle's specific paint code. For custom colors or significant fading concerns, sending a sample piece for color matching provides the most accurate results.
3. Environmental Factors: When Mother Nature Ruins Your Paint Job
Temperature, humidity, dust, and air quality make or break paint jobs. Most DIY setups can't control these variables like professional paint booths.
Environmental challenges:
Temperature: Paint generally performs best between 60-80°F. Extreme temperatures can affect flow and drying, though professionals can make chemical adjustments to compensate.
Humidity: High humidity can trap moisture under paint, causing bubbling and hazing. Low humidity may cause faster drying than ideal.
Dust: Particles from ceiling fans or foot traffic settle on wet paint and become defects.
Ventilation: Proper airflow for safety is required, but it can bring dust contamination if not done in the proper setting (paint booth).
Professional paint booths maintain controlled environments with filtered air that eliminates dust contamination. While temperature and humidity can be managed through product adjustments, the dust-free environment is what your garage simply cannot replicate. Even experienced DIYers struggle with keeping particles out of wet paint, which is why garage-based jobs often show imperfections in the final finish.
4. The Heavy Hand: Over-Application & Paint Runs
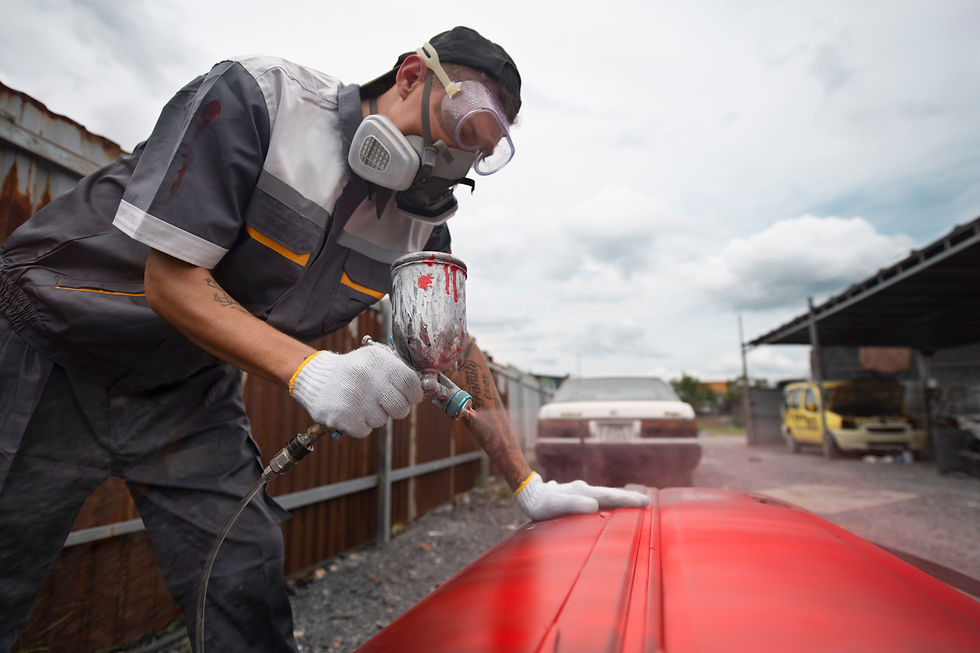
More paint means better coverage, right? This thinking creates visible, frustrating runs and sags.
Spray too much in one area, and gravity pulls wet coating downward before drying. The result? Telltale drips that scream "amateur."
Over-application causes:
Impatience with multiple thin coats
Incorrect spray distance
Poor overlapping technique
Ignoring flash times between coats
Wrong air pressure or spray pattern
Professional painters develop proper technique through years of experience. They know exact spray distance, movement speed, and overlap needed. Multiple thin coats with proper flash time prevent runs.
Once you have runs, fixing them is difficult. You'll need complete drying, wet sanding, polishing, and potentially, starting over if not repairable. Weekend project becomes multi-week ordeal.
5. The Forgotten Shield: Neglecting Clear Coat Protection
Color coat looks great. You're done, right? Not even close. Skipping clear coat is like painting a masterpiece and leaving it in rain. Clear coat protects against UV rays, bird droppings, road salt, and environmental damage.
Clear coat functions:
UV protection preventing color fade
Glossy "wet look" finish
Scratch and chemical etching resistance
Color coat sealing and protection
Depth for metallic and pearl finishes
Without proper clear coat, paint deteriorates within months. Color fades, surface oxidizes, and chips penetrate to base coat.
Clear coat application is more demanding than color coat. It needs thickness without running, dust-free conditions, and adequate curing time. Professional application requires correct products, mixing ratios, spray technique, and environmental conditions. Getting these right in home garages challenges even experienced DIYers.
6. Common Car Paint Repair Mistakes: Rushing the Curing Process
Your car looks amazing. Paint feels dry. Time for a victory drive?
Here's what many DIYers don't realize: there's a difference between dry and cured. Rushing this stage is one of the most common car paint repair mistakes that can undermine otherwise decent work.
Paint dries when solvents evaporate (hours). Paint cures when chemical crosslinking creates a hardened, durable finish (typically 30-45 days).
While you can certainly drive your car after the paint is dry to the touch, the finish becomes increasingly durable as it cures. During early stages, it's more vulnerable to water spotting, chemical etching, and damage from covers or harsh conditions.
The challenge with DIY repairs is that mistakes made during application become more apparent as the paint cures. Improper surface prep, contamination, or application errors may not show immediately but can cause problems as the paint hardens.
Professional application in controlled environments minimizes these risks. While all automotive paint requires curing time regardless of who applies it, starting with proper application technique and clean conditions gives the finish its best chance at long-term durability.
7. Safety Shortcuts: The Invisible Danger
The other six mistakes ruin paint jobs. This one can ruin your health.
Automotive paints contain genuinely dangerous chemicals when inhaled or absorbed. Those strong fumes are volatile organic compounds (VOCs) causing immediate symptoms like dizziness plus potential long-term effects.
Non-negotiable safety equipment:
Proper respirator with organic vapor cartridges (not dust masks)
Chemical-resistant gloves
Eye protection
Adequate ventilation
Fire extinguisher (paint fumes are flammable)
Proper material disposal
Weekend warriors regularly skip these precautions. They work in poorly ventilated garages using dust masks instead of respirators.
If you smell paint strongly, you're exposed to harmful chemicals. Professional body shops operate under strict safety regulations with proper ventilation, hazardous waste disposal, and OSHA-standard equipment.
Frequently Asked Questions
When should I attempt DIY paint repair versus using pre-painted replacement parts?
DIY makes sense for minor touch-ups like small scratches or small parts. For larger repairs on visible panels, pre-painted parts provide better results. If damage exceeds credit card size or you're inexperienced, professionally painted parts deliver superior outcomes with installation taking hours versus weeks.
How long does automotive paint really take to fully cure?
Complete curing typically takes 30 days for most automotive paint systems. Paint feels dry within hours but remains vulnerable to damage, spotting, and chemical etching during the first week. Avoid automatic washes, waxing, or covers for the full month as temperature and humidity affect curing times.
How can I tell if my paint damage is too severe for DIY repair?
If damage penetrates through clear coat to basecoat or primer, shows rust, covers area larger than your palm, involves flexible plastic bumpers, or affects multiple panels, professional solutions work better. The fingernail test helps: if your nail catches significantly when dragged across the scratch, it's likely too deep for simple DIY correction.
Conclusion
DIY car paint repair appeals to many car owners. For small touch-ups, it's often the right choice. But as we've explored, professional results require more than skill. They demand proper equipment, controlled environments, quality materials, and years of experience.
The seven mistakes we've covered trap even experienced DIYers without professional-grade facilities. Quality repairs matter because poor paint jobs decrease vehicle value and leave damage vulnerable to rust and deterioration.
Pre-painted replacement parts offer the best of both worlds: professional workmanship with factory-matched color codes, plus the satisfaction of self-installation. At Painted OEM Parts, we've delivered this solution since 2015 to over 8,000 satisfied customers.
Every part ships with our lifetime warranty and professional-quality application. Whether OEM or OE Replacement parts, you receive a finish perfected through years of experience in controlled environments. No dust contamination, proper surface preparation, and expert application technique built in.
Ready to skip paint repair headaches? Contact us today for quotes on pre-painted parts matched to your vehicle, or browse our inventory for professional results without professional hassle.
A fast-moving character like Sonic lends itself well to action-themed coloring pages. This set includes motifs such as collecting rings and birthday scenes, which should appeal to younger fans. The A4 PDF format is practical for printing at home, and the option to color online is convenient when you are away from a printer. The collection appears to be refreshed periodically, which is a good sign for those who want new material over time. PhotoColorify's action-themed page set lists the current designs, making it easy to see what is available before you commit to a download.